
Product Visualization in Blender 5.2: From Model to Catalog Render

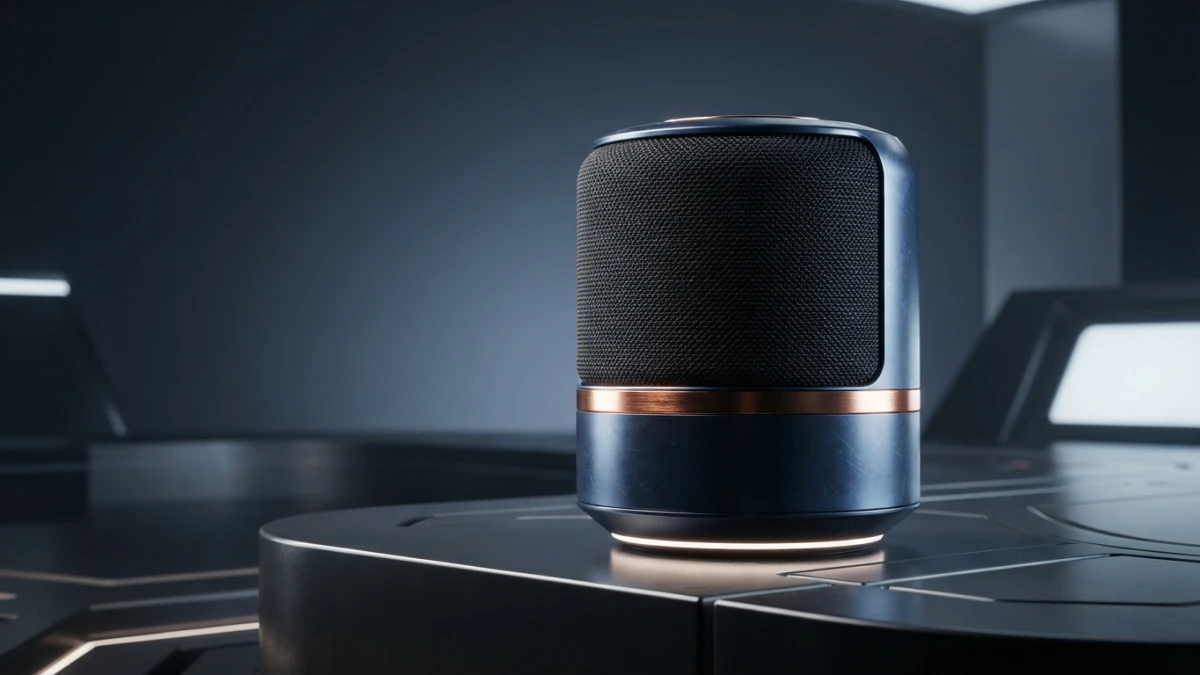
Your product is well modeled, but the render gives it away: harsh light, dirty reflections, and a backdrop that screams amateur scene. The catalog finish is not automatic — it is a virtual-studio workflow with real-world scale, HDRI, area lights, PBR materials, and a tuned Cycles render. This product visualization tutorial in Blender 5.2 builds that workflow step by step.
What Product Visualization Is and Why It Looks Studio-Grade
Product visualization is the craft of generating photorealistic images of an object for catalogs, online stores, or commercial presentations. When you look at a perfume bottle on a website, it is usually not a photo: it is a render built with a very specific workflow that mimics a real photo studio.
From Hobby Render to Catalog Finish
The gap between a render that looks like a hobby piece and one that looks like a catalog shot is not in the model or the computer. It comes down to four decisions: working at real-world scale, lighting with a photographer's mindset, building physically correct materials, and tuning the final render with an engine like Cycles. Each piece contributes, and none can be skipped.
The Workflow: Scene, Light, Material, Backdrop, Render
The canonical order never changes: scene first (units, camera, framing), then light, then materials, then the floor and backdrop, and finally the render with its quality settings. Change the order and you will redo work: light designed around an object at the wrong scale simply does not behave the same way.
Setting Up the Scene and Camera
Real-World Scale and Units from the Start
Open Blender 5.2 and check the scene units before importing anything. A product designed in centimeters but rendered as if it measured meters reacts differently to light: light sizes, depth of field, and shadows all depend on actual scale. Set metric units in Scene Properties and confirm the object's real dimensions with the measure tool or the transform panel.
Product Camera: Height, 50-85mm Focal Length, Framing
A product camera sits at the object's height or slightly above — never in an exaggerated high angle or at floor level. Use a focal length between 50 and 85 mm: wider angles distort the product, while much longer lenses compress its shape. The studio trick is to keep the camera still and rotate the product or the turntable to find the angle that best shows the silhouette and the label.
The Backdrop and Floor: Where the Product "Sits"
A clean catalog render needs two separate things: an infinite floor where the product visually rests, and a backdrop you can change later. The floor can be a large plane or a curved surface that blends into the horizon; the backdrop is handled with transparency and compositing, as you will see shortly.
Lighting Like a Photo Studio
CC0 Studio HDRI: Environment and Reflections
The first lighting step is the World: load a studio HDRI, not an outdoor one. A studio HDRI lights the scene with soft white light from every direction and, more importantly, paints the long clean reflections expected on a glass bottle or a metal surface. Poly Haven offers thousands of free HDRIs under the CC0 license, no login required, ready to drag into the World or the asset browser.
Three Area Lights: Key, Fill, and Rim (Softbox Setup)
On top of the HDRI, build the classic three-point scheme with area lights. The key light goes on one side, large and at roughly 45 degrees, defining volume and the main specular highlights. The fill light sits opposite with less power to open the shadows without flattening them. The rim or back light goes behind the product to carve its edge and separate it from the backdrop. In Blender, a large rectangular area light simulates a real softbox.
Soft Shadows: Light Size, Distance, and Quick Tips
Here is the rule that changes product renders the most: the larger the light and the closer it is to the object, the softer the shadow. If the shadow looks hard or a highlight breaks into an ugly point, enlarge the area light before raising its power. And if a reflection from the HDRI bothers you on a material, do not delete the World: rotate the HDRI by turning its Mapping node.
PBR Materials for Products
Principled BSDF: Metallic, Roughness, and Catalog Finishes
Product materials are built with the Principled BSDF and very few well-calibrated values. For a premium finish, think about what the real material would do: polished metal takes Metallic at 1 with low roughness; satin plastic takes Metallic at 0 with medium roughness; matte rubber takes high roughness. Change one value at a time and compare against a real reference, not against what sounds technical.
Thin Plastics and Glass: The Thin Wall Mode in Blender 5.2
Product packaging — bottles, jars, blister packs — consists of thin surfaces, and that is where the new Cycles feature in 5.2 comes in: the Thin Wall mode on the Principled BSDF. Enable it on the node when the object is a thin wall without volume thickness: it simplifies shading for thin plastic and glass and avoids extra geometry that adds nothing to the result. It is one of the release improvements designed precisely for this kind of work.
Labels and Details: Texture over UVs or Nodes
A bottle label or a gadget logo is solved with a texture over the object's UVs or with nodes. If the piece already has UVs, connect the image into the Base Color input and mix it correctly over the container material; if not, a well-masked procedural texture node can deliver a clean detail.
Real Shadows and a Transparent Backdrop
Shadow Catcher: A Floor That Only Captures the Shadow
A product render for the web is composited afterward, so the shadow cannot be stuck to a floor that later gets in the way. The solution is the Shadow Catcher: enable that option in the floor object's properties (Object Properties, Visibility section) and the plane stops being visible while still capturing the projected shadow. The product keeps its visual contact with the ground, but the backdrop stays free.
Film Transparent: Transparent PNG for Web and Catalog
In Render Properties, open Film and enable Transparent. With the Shadow Catcher on the floor and transparent film, the render comes out with an alpha channel: the product with its shadow, no backdrop. That transparent PNG goes straight into the store listing, can be placed over a white catalog background, or can be composited over any color without re-rendering.
The Final Render in Cycles
Adaptive Sampling and the OpenImageDenoise Denoiser
For the final shot, switch the engine to Cycles. Enable adaptive sampling so the engine spends samples where they are needed and stops computing where the image is already clean. Then turn on the denoiser with OpenImageDenoise: with it you can lower the sample count and still get a grain-free render in a fraction of the time. A typical product flow: moderate samples, denoising enabled, and a review of the result in the render view.
View Transform: Filmic or AgX for Dynamic Range
In Color Management, choose Filmic or AgX as the view transform. Both compress the dynamic range and keep the highlights of studio lights from blowing out; AgX is the more modern option with better color handling. For catalogs, many workflows use Filmic with a gentle curve or straight AgX: test both on the same render and keep the one that preserves the product's color best.
Output: PNG for Web, EXR for Compositing
Set the output format according to the destination. For the web and catalogs, use a high-resolution PNG with an alpha channel. If you plan deeper retouching or compositing, also render a copy as EXR: it keeps the full dynamic range and gives you color freedom in the compositor or an external editor without losing information.
Beyond the Still Image
Angle Sets: Changing the Camera Without Touching the Light
When the client or the store asks for several shots, do not relight every time. Lock the light and the material, duplicate the camera, and change only the angle: front, three-quarter, label detail, back with a carved edge. Keeping the light consistent across shots is what makes the set look coherent in the catalog.
360° Turntable: Product Animation for the Listing
For an e-commerce product listing, a 360-degree animation helps far more than a single photo. Place the product on a rotation axis (an empty as parent of the object or a camera orbit) and render the turntable. With the scene already lit and materials ready, the animation is nearly free: just add the rotation and adjust the frame range.
EEVEE for Fast Previews and When to Use Each Engine
The render engine is not a religion; it is an output decision. Cycles is for the final photorealistic shot, with denoising and view transforms tuned. EEVEE is for fast iteration, real-time previews, and turntables when speed matters. In Blender 5.2, EEVEE also improves performance in scenes with many instances, which helps when you work with multi-piece catalogs.
What Blender 5.2 Brings to This Workflow
Blender 5.2 LTS was released on July 14, 2026, and its rendering roadmap points straight at this kind of work.
Cycles Texture Cache and the Principled BSDF Thin Wall
In Cycles, the release introduces a texture cache that speeds up iteration when working with large textures — common when compositing labels and product materials — and adds the Thin Wall mode to the Principled BSDF for thin surfaces, the key piece for plastics, glass, and thin-walled packaging without modeling actual volume thickness.
EEVEE: Usability and Instancing Performance
EEVEE in 5.2 resolves usability issues carried over from previous versions and leverages the same instancing optimizations as Workbench and Overlay: CPU-bound scenes with many instances can render up to twice as fast. On a product set with several pieces or repeated elements, that shows up in daily iteration.
Conclusion
Catalog-grade product rendering is not a matter of luck or an expensive add-on: it is a repeatable workflow with real-world scale, a product camera, studio lighting with an HDRI and area lights, PBR materials, a Shadow Catcher, and a well-tuned Cycles render with denoising. Build the workflow once on an example product and you will have the foundation to present any model with a professional finish. If this tutorial helped, keep reading the blog: there are more Blender 5.2 guides on scene lighting, materials, and rendering.














