
Cel Shading in Blender 5.2 Step by Step: Anime Look with EEVEE, Shader to RGB, and Freestyle

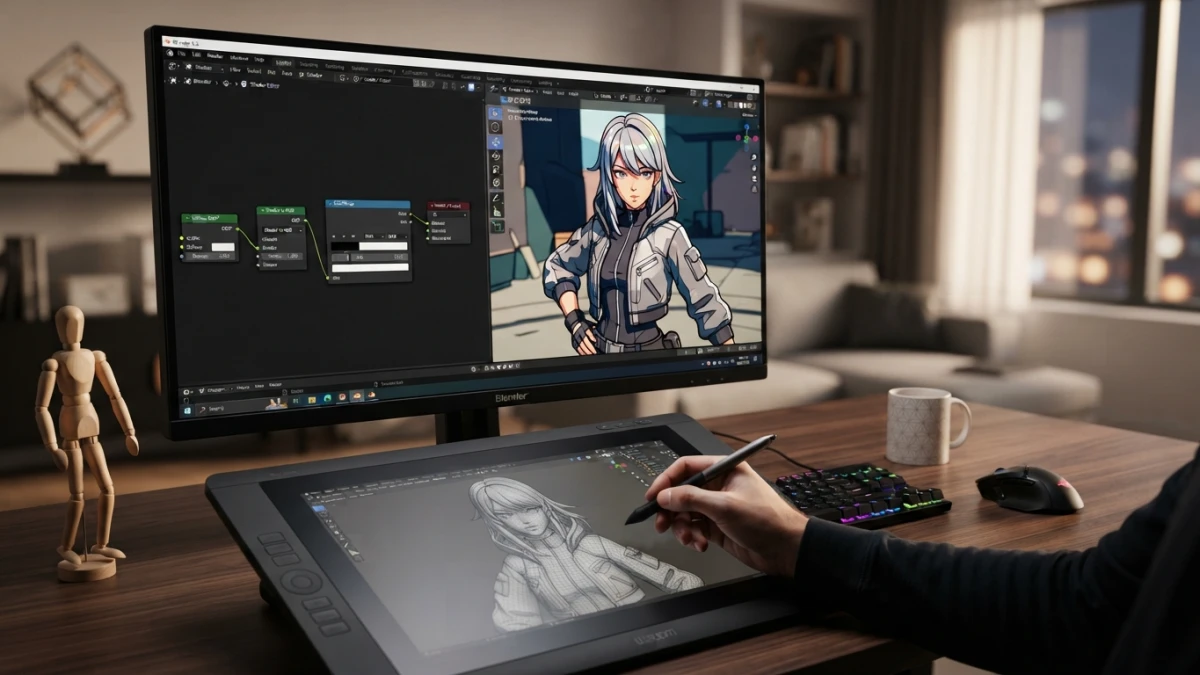
You want an anime or cartoon look and your render comes out with photorealistic gradients: cel shading in Blender is built in EEVEE with the Shader to RGB node and a ColorRamp that cuts light into flat bands, plus outlines with Freestyle or an inverted hull. This guide builds it step by step, no add-ons.
What Cel Shading Is and Why It Looks So Different
You modeled a character, set up a scene, or prepared an object, and when you render with your usual materials you get physical lighting and soft gradients... but what the project asked for was flat anime color, hard shadows cut like a knife, and a clean outline around the figure. That clash is understandable: the toon look does not happen by itself, it is a rendering style with its own rules, and most guides out there are years old or depend on commercial add-ons. The good news is that Blender ships everything you need, and this tutorial builds it with plain nodes in EEVEE.
From Realistic Gradients to Flat Bands of Color
A photorealistic material tries to imitate real light: the closer to the light source, the brighter, and the transition between light and shadow is a continuous gradient. Cel shading does the opposite: it simplifies light into a small number of tones and turns that gradient into a dry step. Instead of a thousand grays between white and black, you see two or three: the lit area, the shadow, and, if you want, a midtone. That quantization is the visual signature of the style.
NPR Rendering: When Style Matters More than Physics
In English it is known as non-photorealistic rendering (NPR): a family of techniques whose goal is not to look like a photo but like an illustration. It serves anime characters, game assets with a cartoon finish, explainer videos, or any project where the visual consistency of the style matters more than light physics. In Blender you do not need another engine to get into NPR: EEVEE gives real-time feedback and Cycles gives production quality, each with its own path.
Read also
The Anime Look: Hard Shadows, Flat Color, and Clean Outlines
The anime finish combines three ingredients: hard, directional shadows, flat local color, and a marked outline that separates the figure from the background. The first two come from the toon material; the third comes from the outline techniques covered later. If any of the three is missing, the result stays halfway between realistic and illustrated.
The Foundation: Shader to RGB in EEVEE
Reading Light as Color: From a BSDF to the Shader to RGB Node
The heart of the workflow is the Shader to RGB node. In EEVEE it converts the output of a BSDF shader, meaning the already computed illumination on the surface, into color information you can manipulate with regular nodes. By feeding that signal into a ColorRamp you decide how each light level translates into a specific color, instead of letting the engine soften it on its own.
Why This Workflow Lives in EEVEE (Real-Time and a Supported Node)
The official Blender 5.2 manual lists Shader to RGB among the nodes supported by EEVEE, and that is where the workflow shines: you see the ramp cut instantly, you move the light, and the band reacts in real time. It is the same reason the style fits game development and fast character iteration so well: you do not wait for a render to know whether the look works.
What Shader to RGB Does Not Do: Limits and Correct Uses
Be precise about what it offers: Shader to RGB is not a drawing shader and does not paint outlines; it only exposes computed light as color so you can remap it. In Cycles that kind of conversion is not available by design, because the engine works with physical spectral data; that is why the toon node workflow belongs to EEVEE, and Cycles has a different alternative that we cover at the end.
Building the Toon Material Step by Step
Base Scene: Standard View Transform and a Main Directional Light
Before touching nodes, prepare the canvas. In Color Management settings, switch the view transform to Standard: the Filmic look is designed to capture dynamic range and softens contrast, which degrades the toon bands. With Standard, flat color stays put and the ramp cut looks clean. Use a directional sun-like light as the main source: it casts hard, parallel shadows, exactly what the style needs. Avoid large soft area lights: they blur the shadow edge and break the band.
Node by Node: Diffuse to Shader to RGB to ColorRamp
With an example stylized character or object, open the Shader Editor and build the chain: a Diffuse shader (or the Principled BSDF if you already have the material) feeds into the Shader to RGB node, and that node's Color output goes into the Factor of a ColorRamp. The ColorRamp decides how many tones exist and where the cuts are; its output connects to the Base Color of a final material. The other material inputs, like Roughness or Specular, can stay neutral because the style does not need them.
Quantizing Light: Two or Three Stops (Shadow, Midtone, and Light)
The ColorRamp is where the magic happens. With two stops you define shadow and light: the left color paints the areas receiving less light and the right one paints the lit areas, while the stop position marks the threshold. With three stops you add the midtone, which gives that classic anime look with an intermediate band across curved surfaces. You can use black and white to start, then color the shadow to add personality.
Hard or Soft Ramp: Tuning the Band Edge
The cut is controlled by the stop interpolation. Leaving the ramp on Constant, or pulling the stops close together, gives a very hard step, comic-book style. If you open the interpolation a little between stops, you get a short gradient that softens the edge without returning to photorealism: useful for gentle characters or to keep the shadow from flickering on heavily subdivided geometry. The trick is to tune while moving the light and watching the viewport respond.
Outlines: Freestyle and the Inverted Hull Trick
Freestyle in EEVEE: Silhouettes, Creases, and Material Boundaries
The outline is half of the anime look. The first technique is Freestyle, Blender's line system, which draws strokes over the render based on geometry: silhouettes, creases, material boundaries, and more, with control over thickness and color. You enable it in the Render Properties and it works in EEVEE, so you see the lines when rendering the view. It is powerful for full scenes, because a single configuration outlines everything that enters the camera.
Inverted Hull: Solidify with Inverted Normals and an Outline Material
The second technique is more artisanal and very common for characters: the inverted hull. Duplicate the model, add a Solidify modifier with a small thickness, invert the copy's normals (for example by scaling by -1 or from the normals panel), and assign a black material with backface culling disabled. The result is a black shell that peeks out behind the silhouette and draws a uniform outline that follows the character in any animation.
How to Choose Between Freestyle and an Inverted Hull
Freestyle wins when you want stylized lines, thickness that varies with distance, or internal comic-style edges, and when you work with complete scenes. The inverted hull wins for animated characters, because the outline moves with the mesh, is predictable, and does not depend on the line engine; its cost is preparing the copy and watching the thickness at joints. Many artists combine both: a hull for the character and Freestyle for props or the background.
Details That Sell the Look
Rim Light and Separation from the Background
Once you have bands and an outline, the detail that separates a decent toon from a convincing one is the rim light: a back light, usually cool or colored, that draws a lit edge on the side opposite the main sun. It separates the figure from the background, adds depth without breaking the flat color, and is one of the favorite tools of character art for games.
Fake AO and Contact Shadows to Ground the Character
To keep the character from floating, add contact shadows where it touches the ground: fake ambient occlusion with a soft gradient under the figure, or a dark shape with low opacity, anchors the scene. In a toon render it is better to do this with simple elements, like a plane with a radial gradient or an object with the same shadow material, instead of relying on the engine's ambient occlusion, which tends to smear the style.
Flat-Color Textures: Posterizing So They Do Not Break the Style
If the character has textures, make sure they respect the flat palette. A texture with gradients or fine noise introduces variation that clashes with the cel shading bands. The practical fix is to posterize it: reduce it to a few tones inside the texture node or in an image editor before importing, so the local color is as flat as the shadows falling on it.
Style Variations: Colored Shadows with Warm or Cool Tints
Toon does not have to be black and white. Replace the ramp's black with a cool blue for a clean daylight look, or with a warm tone for a sunset scene; many illustrations use bluish shadows because the eye reads them as shadow without dirtying the color. You can also tint the rim light with a saturated color for that anime key-visual finish.
The Non-Real-Time Alternative: Toon BSDF in Cycles
When the project demands Cycles quality and you do not need real-time feedback, there is the Toon BSDF: a shading shader designed for this style that controls the shadow size threshold and angle, with its own diffuse and specular components. It is the path mainly associated with Cycles, while in EEVEE the recommended and supported route is Shader to RGB with a ColorRamp. If you come from a workflow mixing Cycles and EEVEE, check the Cycles vs EEVEE comparison we published a few weeks ago to decide which engine to use in each phase.
EEVEE in Blender 5.2: What Changes for This Workflow
EEVEE Eevolved: The Maturity of the EEVEE Next Architecture
Blender 5.2 LTS is a major release for EEVEE, nicknamed EEVEE Eevolved by the community: it matures the EEVEE Next architecture and solves usability rough edges carried over from the transition. For this tutorial's workflow, the news is that Shader to RGB is confirmed in the 5.2 manual as the official node for custom shading in EEVEE, so the toon path rests on stable ground rather than on an unsupported trick.
Shadow Pools and Light Probe Planes Compatible with Shader to RGB
The EEVEE release notes in 5.2 also bring improvements that touch this workflow directly: new size options for the shadow pool, including 1.5 and 2 GByte pools for scenes with many shadow casters, and support for Light Probe Planes with Blended Material mode and with Shader to RGB. That means you can use light planes for indirect or fill lighting and still read that light with the node without surprises.
Conclusion
The anime look in Blender does not require paid add-ons: with EEVEE, the Shader to RGB node, a well-tuned ColorRamp, and a Freestyle or inverted-hull outline you get solid real-time cel shading. Build the chain on a Standard view transform, quantize light into two or three bands, add a rim light and contact shadows, and you will have a consistent NPR finish for characters, games, or illustration. If you want to keep pushing the style, this blog already covers procedural materials and the Cycles vs EEVEE comparison: head over to the 3D design articles for the next technique.














