
3D production has become an essential tool in various industries, from film and video games to advertising and architecture. This article explores in depth the 3D production workflow, from initial pre-visualization to final rendering, helping artists and professionals understand each stage of the process.
Introduction to the 3D Production Workflow
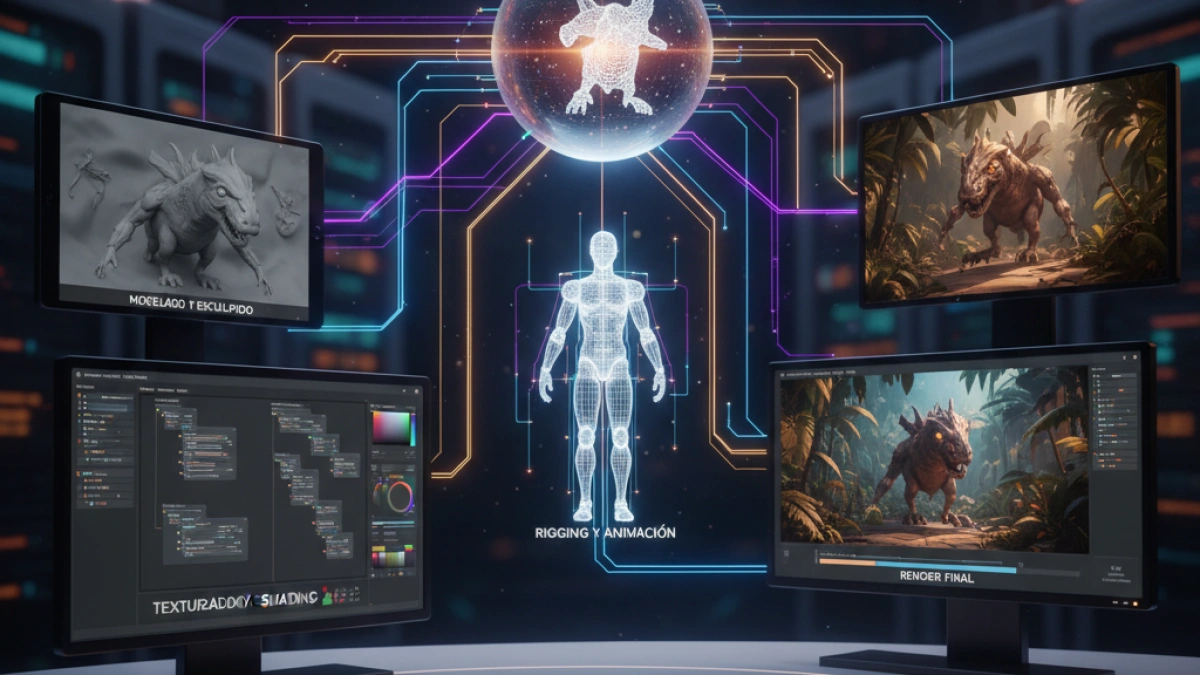
The 3D production workflow is a structured process that allows 3D artists to create digital visualizations efficiently and effectively. Each phase of the workflow is crucial to ensure a high-quality result. Below are the main stages of the process.
Stages of the 3D Production Workflow
1. Preproduction
Preproduction is the initial phase where the project is planned. This includes:
- Conceptualization: Defining the central idea and vision of the project.
- Research: Analyzing references and conducting visual studies to inspire the design.
- Storyboard: Creating a storyboard that serves as a guide for the visual narrative.
Preproduction Tools
- Hand Sketches: Allow for a first visual approach.
- Design Software: Tools like Adobe Photoshop or Illustrator are helpful for creating digital mockups.
2. Modeling
In this phase, artists create the 3D objects and characters. There are several types of modeling:
- Polygonal: Using a mesh of polygons to form the geometry of an object.
- NURBS: A method that employs curved surfaces to model smooth objects.
- 3D Scanning: Capturing real-world models and reproducing them digitally.
Considerations for Modeling
- Topology: Ensuring the mesh has appropriate topology to facilitate animation.
- Scale: Models should be created at a scale that fits the environment in which they will be used.
3. Texturing
Once the models are ready, the next step is applying textures. This provides visual details and realism to the 3D objects.
Types of Textures
- Diffuse: Control the base color of the object.
- Specular: Determine how light reflects off the surface.
- Normal: Provide surface detail without increasing the polygon count.
Texturing Tools
- Substance Painter: Allows for painting texture directly onto the model's surface.
- Adobe Photoshop: Useful for manually creating and editing textures.
4. Rigging and Animation
Rigging is the process of adding a skeleton to 3D models, allowing them to be animated. Animation is the phase where the models come to life.
Animation Techniques
- Keyframe Animation: Establishing key points of movement that the software interpolates.
- Motion Capture: Capturing real actors' movements to apply to 3D models.
5. Lighting
Lighting is essential to establish the atmosphere of the scene. Artists must decide:
- Type of Light: Using directional or global lights.
- Color and Intensity: Adjusting the color and intensity to create the desired ambiance.
6. Rendering
Rendering is the final phase where the final images are created from the 3D models. Rendering engines are software that process all elements of the scene (models, textures, lights) and generate the final image.
Types of Rendering
- Real-time Rendering: Used in video games and interactive applications.
- Batch Rendering: Generates high-quality images for films and advertisements.
Rendering ToolS
- Arnold: A widely used rendering engine in the film industry.
- V-Ray: Popular among architects and designers for visualizing projects.
7. Postproduction
Postproduction encompasses all the final adjustments made after rendering. This can include color correction, adding visual effects, and sound editing.
Postproduction Tools
- Adobe After Effects: Widely used for editing and visual effects.
- DaVinci Resolve: Excellent for color correction and video editing.
Conclusion
The 3D production workflow is a broad and multifaceted process that requires attention to detail at each phase. Understanding each stage is vital for creating high-quality productions that capture the audience's attention. From previsualization to final rendering, each phase significantly contributes to the project's success.
If you wish to delve into the world of 3D production, make sure to master each of these stages and stay updated with the latest tools and techniques in the industry. The ability to navigate effectively through this workflow can make the difference between an average visualization and an impressive masterpiece.


