Learn to implement Material Dashboard in Laravel 9.

The implementation of an attractive and functional dashboard is essential for the development of web applications. In this context, Material Dashboard presents itself as an efficient and modern option that can be easily integrated into Laravel 9. This article offers a step-by-step guide to help you implement Material Dashboard in your Laravel project.
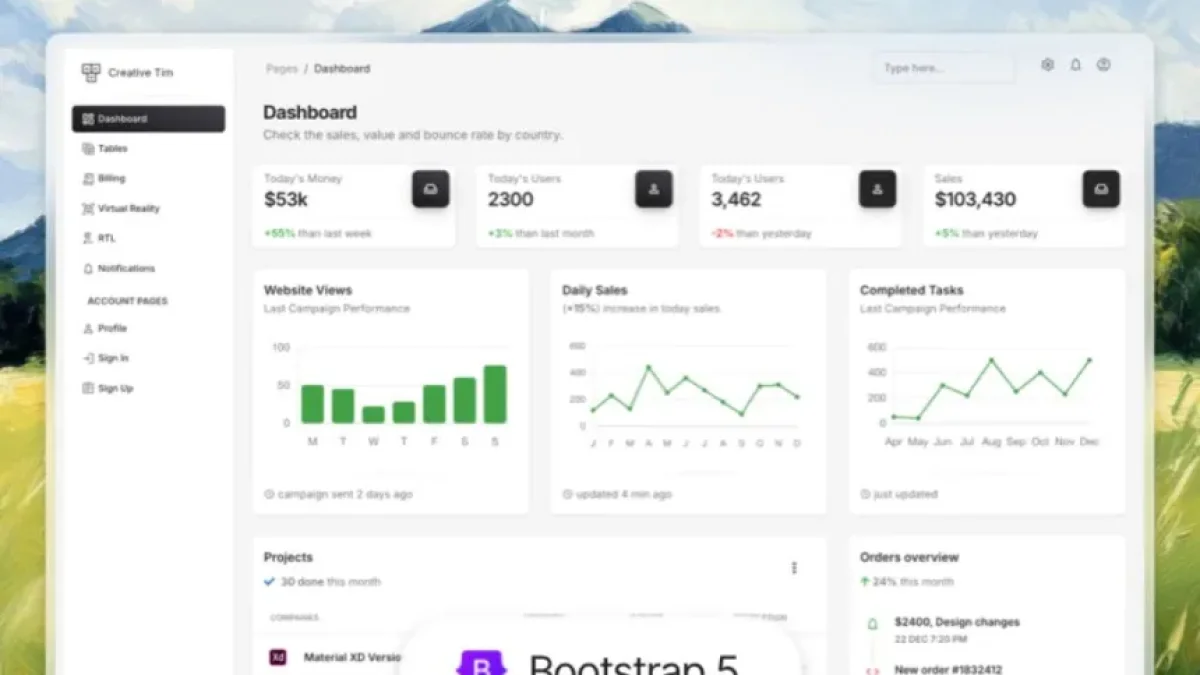
What is Material Dashboard?
Material Dashboard is a design toolkit based on Google’s primary design system, Material Design. This framework provides visual components such as buttons, cards, and forms that allow you to create clean and responsive user interfaces. By combining Material Dashboard with Laravel 9, developers can take advantage of the best of both worlds: a powerful backend structure and a user-friendly frontend design.
Initial Preparations
Before starting the implementation, it is essential to ensure that you have Laravel 9 installed in your development environment. You can check this by opening a terminal and running the following command:
php artisan --versionIf you do not have Laravel installed, you can do so by following the official instructions.
Read also


Installing Material Dashboard
Installing Material Dashboard in Laravel 9 is a straightforward process. First, you need to download the dashboard files from its official website. You can do this through a direct download link or by using a package manager like npm.
Installation by Download
- Visit the Material Dashboard website and download the latest version.
- Unzip the file into your Laravel project, preferably in the
publicfolder.
Installation via npm
If you prefer to use npm, you can install Material Dashboard with the following command:
npm install material-dashboardThis will add the framework to your project and make it easier to manage.
Read also

Integrating Material Dashboard in Laravel
Once you have completed the installation, the next step is to integrate the style files and the scripts of Material Dashboard into your Laravel application. To do this, you will need to modify the resources/views/layouts/app.blade.php file, where the styles and scripts of your application are included.
- Open the
app.blade.phpfile. - Make sure to include links to the CSS and JS files of Material Dashboard in the appropriate sections. For example, inside the
<head>tag for the styles and just before the closing</body>tag for the scripts.
<link rel="stylesheet" href="{{ asset('css/material-dashboard.css') }}">
<script src="{{ asset('js/material-dashboard.js') }}"></script>
Creating the Dashboard Structure
With the styles and scripts integrated correctly, you can now start creating the views for your dashboard. Laravel uses Blade as its templating engine, which allows you to easily extend and customize views.
- Create a view called
dashboard.blade.phpinside theresources/viewsfolder. - Extend the base layout you configured and add the Material Dashboard components according to your needs.
Example of Basic Structure
@extends('layouts.app')

@section('content')
<div class="container">
    <h1>Dashboard</h1>
    <div class="row">
        <!-- Example of component usage -->
        <div class="col-md-3">
            <div class="card">
                <div class="card-header">Card Title</div>
                <div class="card-body">Card content.</div>
            </div>
        </div>
    </div>
</div>
@endsection
Conclusion
Implementing Material Dashboard in Laravel 9 is an accessible process that allows developers to create impactful and functional interfaces. By following the steps mentioned, you can enhance the user experience of your web applications without unnecessary complications.
If you want to continue learning about web development and current technologies, I invite you to explore more news and articles like this on my blog. See you in the next post!


